


最後はカスタマイズについて色々やってみようか
今回はゲーム配信などでOBSのクロマキー合成(透過)にそのまま使えるように、「配信向けグリーンバック演出」にアレンジしていくよ!

YouTubeとかの配信で、大きな声を出した回数を画面に表示するやつだね!かっこいい!
まずは、完成したプログラムを動かしてみよう!
オッケー!
import numpy as np
import sounddevice as sd
import matplotlib.pyplot as plt
import matplotlib.animation as animation
import japanize_matplotlib

SAMPLE_RATE = 44100
BLOCK_SIZE = 1024
HISTORY_LEN = 100
THRESHOLD = 0.15
COOLDOWN_FRAMES = 15
GREEN_BACK = "#00FF00"


class StreamingCounter:
    """マイクの音量を監視し、配信向けの見た目でカウントを表示するクラス"""

    def __init__(self, fig, ax, threshold=THRESHOLD, cooldown_frames=COOLDOWN_FRAMES,
                 history_len=HISTORY_LEN):
        self.threshold = threshold
        self.cooldown_frames = cooldown_frames
        self.cooldown = 0
        self.count = 0

        self.history_len = history_len
        self.volume_history = [0.0] * history_len
        self.current_volume = 0.0

        fig.patch.set_facecolor(GREEN_BACK)
        ax.set_facecolor(GREEN_BACK)

        self.line, = ax.plot(self.volume_history, color="white", linewidth=2)
        ax.axhline(threshold, color="black", linestyle="--", label="閾値")
        ax.set_ylim(0, 1.0)
        ax.set_title("Step6: 配信向けグリーンバック演出")
        ax.legend(loc="upper right")

        self.count_text = ax.text(
            0.02, 0.92, "", transform=ax.transAxes,
            fontsize=16, color="white", fontweight="bold"
        )

    def audio_callback(self, indata, frames, time, status):
        self.current_volume = float(np.sqrt(np.mean(indata ** 2)))

    def update(self, frame):
        self.volume_history.append(self.current_volume)
        self.volume_history.pop(0)
        self.line.set_ydata(self.volume_history)

        if self.cooldown > 0:
            self.cooldown -= 1
        elif self.current_volume > self.threshold:
            self.count += 1
            self.cooldown = self.cooldown_frames

        if self.current_volume > self.threshold:
            self.line.set_color("red")
        else:
            self.line.set_color("white")

        self.count_text.set_text(f"カウント: {self.count}")
        return self.line, self.count_text


fig, ax = plt.subplots()
counter = StreamingCounter(fig, ax)

stream = sd.InputStream(
    channels=1, samplerate=SAMPLE_RATE, blocksize=BLOCK_SIZE,
    callback=counter.audio_callback,
)

with stream:
    ani = animation.FuncAnimation(fig, counter.update, interval=50)
    plt.show()
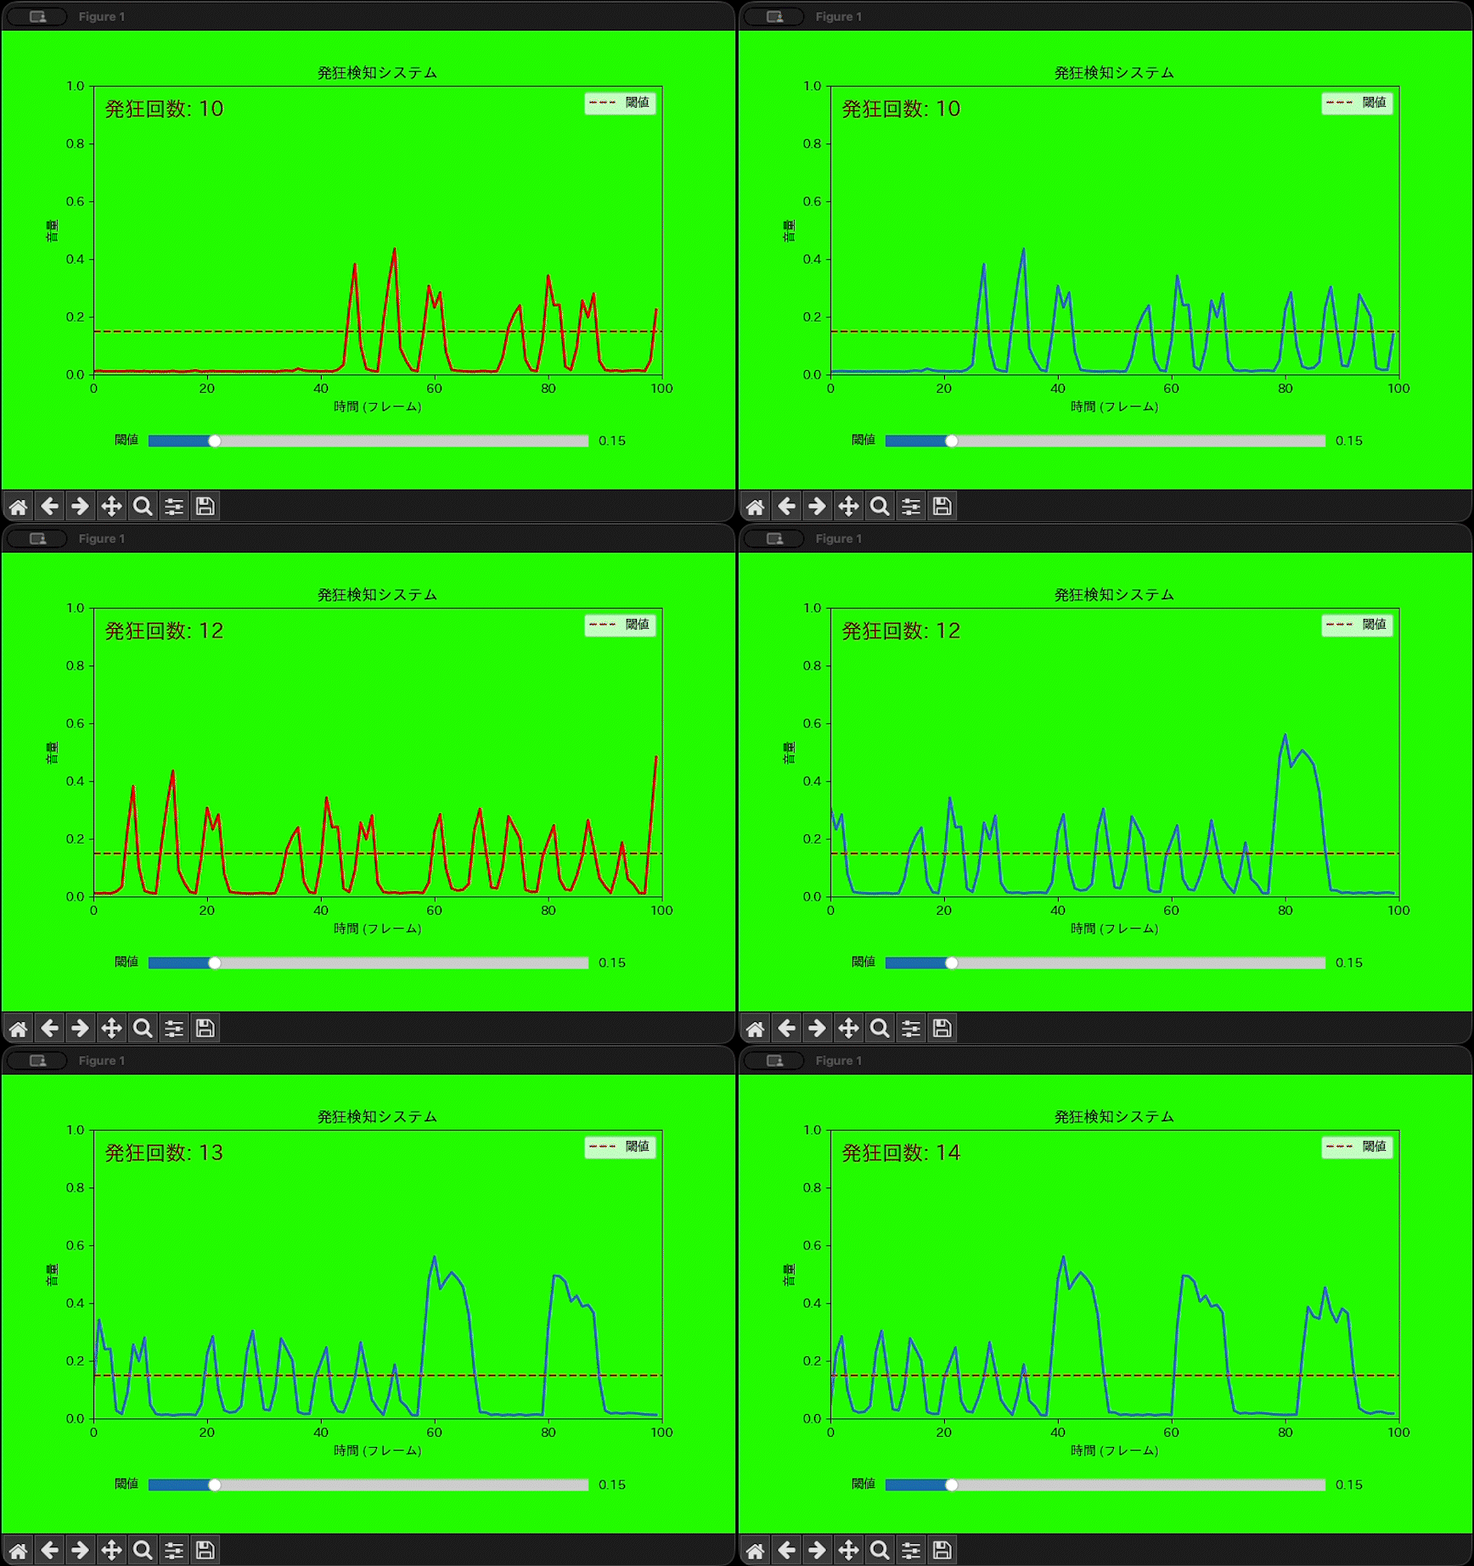
おおー!背景が緑色になって、普段は白いグラフの線が、大声を出すと一瞬「赤色」に変わる!
一目で「あ、今叫んだな!」ってわかるからすごく見やすいね!
そうでしょ?
今回は「見た目の演出」を強化したんだけど、コードのポイントは「Matplotlibのグラフ構造のパーツ分け」と「動的な色の変更」の2点やね
パーツ分け...?
そう!
Matplotlibのグラフって、実は複数のパーツが重なってできてるんだよね
1. ウィンドウ全体の外枠にあたる「fig」
2. 目盛りや軸があるグラフの描画エリア「ax」
3. データを表す線そのものの「line」
あ、今まで普通に「fig, ax = plt.subplots()」についてはなんとなくで流してたけど、外枠と描画エリアで別物なんだ!
そういうこと!
だから「背景をグリーンバックにする」時は、29行目の「fig.patch.set_facecolor(GREEN_BACK)」で外枠の色を変えて、30行目の「ax.set_facecolor(GREEN_BACK)」で内側のエリアの色を変えてるんだよ
GREEN_BACK = "#00FF00"

fig.patch.set_facecolor(GREEN_BACK)  # ウィンドウ全体(外枠)
ax.set_facecolor(GREEN_BACK)         # グラフ描画エリア
片方だけじゃなくて、両方の背景色を緑に変えることで画面全体がグリーンバックになるんだね!
そして2つ目のポイントは、大声をあげる(閾値を超えた)瞬間にグラフの線の色を変える演出!
57〜60行目を見てほしいんだけど、「update()」の中で「音量が閾値を超えている部分」ではなく「今までに」でもなく「今まさに音量が閾値を超えているか」を判定して、「self.line.set_color("red")」と「self.line.set_color("white")」でリアルタイムに線全体の色を切り替えているんだよ
if self.current_volume > self.threshold:
    self.line.set_color("red")
else:
    self.line.set_color("white")
あ!カウント用の「self.cooldown」とは別に、純粋に「今の音量」を見て色を変えてるんだね!
そういうこと
カウント判定は冷却時間で連打を防ぎつつ、見た目の演出は音量に合わせて毎フレーム即座に反応するように設計してるわけだね!
演出と判定のロジックがしっかり分けられててすごく綺麗!
まとめると、今回のポイントは
1. OBS等のクロマキー合成用に背景を緑にする(「fig.patch.set_facecolor」&「ax.set_facecolor」, 29-30行目)
2. 閾値超過時に線の色を白から赤に動的変更して視覚的効果を高める(「self.line.set_color()」, 58, 60行目)
の2点やね!
これでついに、マイク音量をリアルタイムで監視してカウント&演出する配信アプリが完成したね!
だね!
今回は標準マイクを使ったシンプルな構成で解説してきたけど、Step3で紹介したマイク選択処理を追加したり、他のGUIライブラリと組み合わせたり、色々なカスタマイズができるよ!ぜひ自分だけのアレンジにも挑戦してみてね!
はーい!とりあえずまずは、これを使ってホラーゲームの実況配信をしてみようかな!